Smart Home IoT Kit Lesson 21 4*4 Keypad
4*4 Keypadのレッスンがなかったので作る。
Smart Home IoT Kit Lesson 21 4*4 Keypad
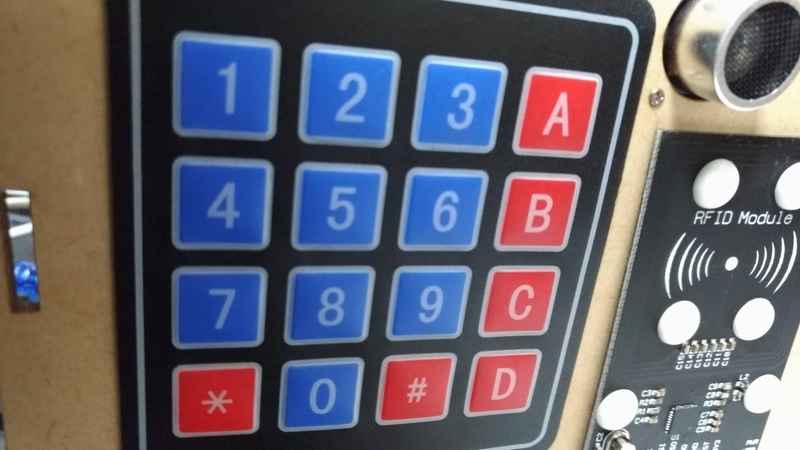
まず、基盤上にPINがアサインされているので接続する。(4×4 Keypadと書いてある)

さて、Yun Iotの
https://osoyoo.com/2018/03/22/osoyoo-yun-iot-lesson-4x4-keypad/
を参考にしてみる。
まずは、Keypadライブラリを導入
次に、Sketchにソースをコピーしてコンパイルしてみる。
#include “console.h”
#include “bridge.h”
#include “keypad.h”
const byte ROWS = 4; //four rows
const byte COLS = 4; //four columns
//define the cymbols on the buttons of the keypads
char hexaKeys[ROWS][COLS] = {
{‘1′,’2′,’3′,’A’},
{‘4′,’5′,’6′,’B’},
{‘7′,’8′,’9′,’C’},
{‘*’,’0′,’#’,’D’}
};
byte rowPins[ROWS] = {47, 45, 43, 41}; //connect to the row pinouts of the keypad
byte colPins[COLS] = {39, 37, 35, 33}; //connect to the column pinouts of the keypad

//initialize an instance of class NewKeypad
Keypad customKeypad = Keypad( makeKeymap(hexaKeys), rowPins, colPins, ROWS, COLS);

void setup(){
Bridge.begin();
Console.begin();
while (!Console);
}

void loop(){
char customKey = customKeypad.getKey();

if (customKey){
Console.println(customKey);
}
}
Arduino: 1.8.12 (Mac OS X), Board: "Arduino/Genuino Mega or Mega 2560, ATmega2560 (Mega 2560)"

smarthome-lession21iroz:1:10: error: #include expects "FILENAME" or <filename>
 #include “console.h”
          ^
smarthome-lession21iroz:2:10: error: #include expects "FILENAME" or <filename>
 #include “bridge.h”
          ^
smarthome-lession21iroz:3:10: error: #include expects "FILENAME" or <filename>

 #include “keypad.h”
          ^
exit status 1
#include expects "FILENAME" or ≷filename>

This report would have more information with
"Show verbose output during compilation"
option enabled in File -> Preferences.
なんだかエラーが出ているので、よく確認すると、 “と"で違う ”と" ’と' ‘と' ′と' も。ということで修正しとく。 なんでこうなるんだろう?
そして、ConsoleもBridgeも通らないので、ソースを変更。(ConsoleはSerialにして、Bridgeはいらない。)
それで、Keypadから入力すると動いた。入力がシリアルモニターに表示されるようになったが、押したボタンとシリアルモニターに表示される記号がずれる。
入力値 (シリアルモニタ表示)
1 (D)
2 (C)
3 (B)
A (A)
4 (#)
5 (9)
6 (6)
B (3)
7 (0)
8 (8)
9 (5)
C (2)
* (*)
0 (7)
# (4)
D (1)
どうも、ずれ方が対角線で折り返したようなずれ方。(A,6,8,*が正しい・・・・。)
https://osoyoo.com/2018/03/22/osoyoo-yun-iot-lesson-4x4-keypad/
だと、

今の基盤をみると

4*4 Keypad pin <-> 実際の基盤 <-> Webでの接続表記
1 <-> D33 <-> D47
2 <-> D35 <-> D45
3 <-> D37 <-> D43
4 <-> D39 <-> D41
5 <-> D41 <-> D39
6 <-> D43 <-> D37
7 <-> D45 <-> D35
8 <-> D47 <-> D33
の全く逆なので、反転して接続するのが良いのだろうがケーブル長が足りない。
ということで、Sketchを変更して完成。
smarthome-lession21iroz.ino
#include <Key.h>
#include <Keypad.h>

#include "SoftwareSerial.h"
SoftwareSerial EspSerial(A9, A8); // RX, TX


//#include "console.h"
//#include "bridge.h"
//#include "keypad.h"

const byte ROWS = 4; //four rows
const byte COLS = 4; //four columns
//define the cymbols on the buttons of the keypads

char hexaKeys[ROWS][COLS] = {
  {'1','2','3','A'},
  {'4','5','6','B'},
  {'7','8','9','C'},
  {'*','0','#','D'}
};
//byte rowPins[ROWS] = {47, 45, 43, 41}; //connect to the row pinouts of the keypad
//byte colPins[COLS] = {39, 37, 35, 33}; //connect to the column pinouts of the keypad

byte rowPins[ROWS] = {33,35,37,39}; //connect to the row pinouts of the keypad
byte colPins[COLS] = {41,43,45,47}; //connect to the column pinouts of the keypad


//initialize an instance of class NewKeypad
Keypad customKeypad = Keypad( makeKeymap(hexaKeys), rowPins, colPins, ROWS, COLS);

void setup(){
//Bridge.begin();
//Serial.begin();
  Serial.begin(9600);

while (!Serial);
}

void loop(){
char customKey = customKeypad.getKey();

if (customKey){
Serial.println(customKey);
}
}
ちゃんと動きました。
Lession21(自作)作成完了!
このKitに入っている4*4 Keypad使えるようになりました。

Smart Home IoT Blynk導入 3 - Blynk Widgets : LED Blynk
IoTをグラフィカルに簡単に使えるようになるBlynkだが、前回シンプルなLチカであったのと、Light Blinkという同じことをしそうなサンプルがあるので試してみる。
ExampleをLight Blinkで、試してみる。

前回と同様の修正を行う。
auth、ssid、passの入力。SoftwareSerialのMEGA2560向け修正
一応ESP8266_BAUDも9600へ。
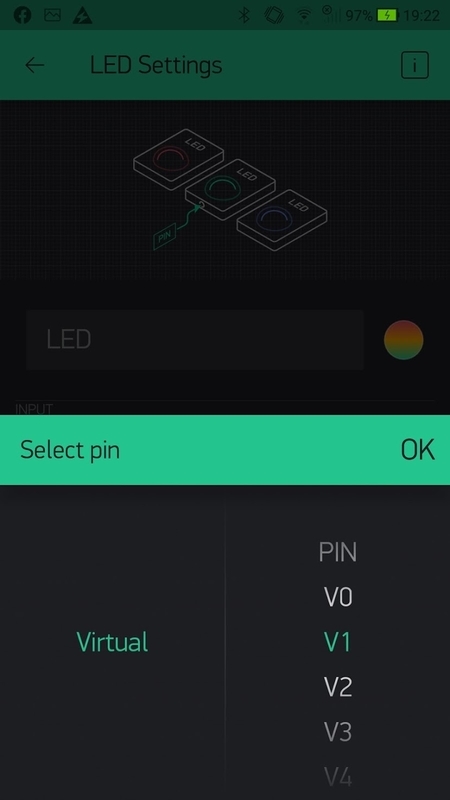
WidgetLED led1(V1);
のV1がどこからきたかググると、BlynkアプリのバーチャルPINっぽいぞ。
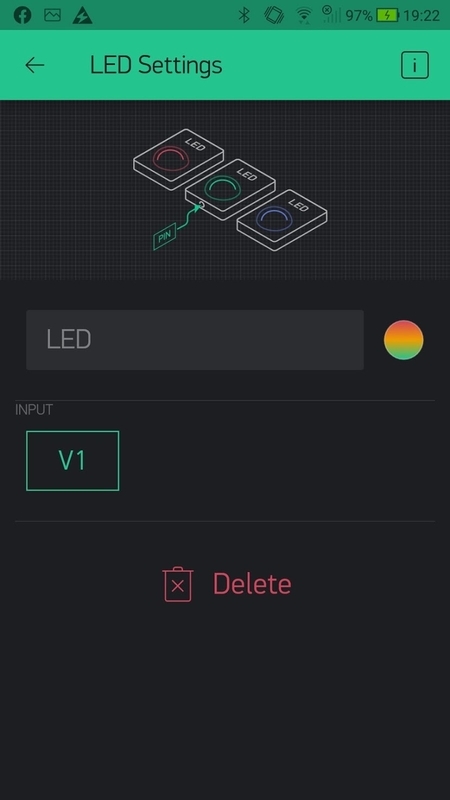
とういうことで、LEDをキャンパスに追加して、
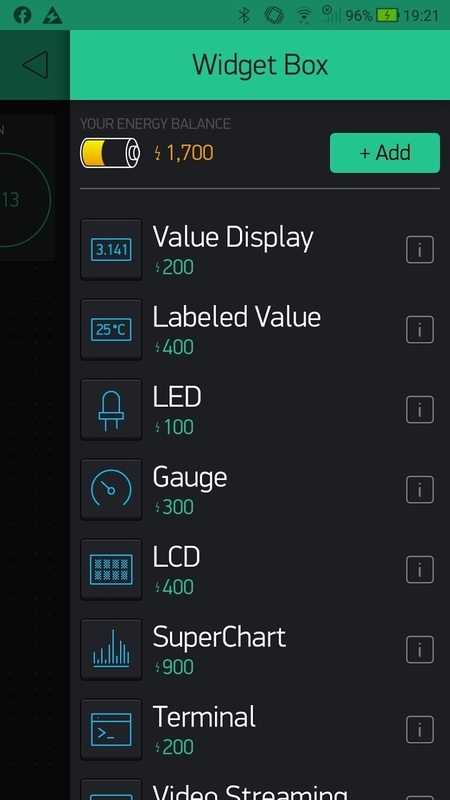
pinをV1に設定
さて、シリアルモニターで。
19:08:54.874 -> [9]
19:08:54.874 ->     ___  __          __
19:08:54.911 ->    / _ )/ /_ _____  / /__
19:08:54.949 ->   / _  / / // / _ \/  '_/
19:08:54.986 ->  /____/_/\_, /_//_/_/\_\
19:08:54.986 ->         /___/ v0.6.1 on Arduino Mega
19:08:55.024 ->
19:08:55.483 -> [599] Connecting to aterm-36be98-g
19:08:58.681 -> [3809] AT version:1.2.0.0(Jul  1 2016 20:04:45)
19:08:58.753 -> SDK version:1.5.4.1(39cb9a32)
19:08:58.753 -> Ai-Thinker Technology Co. Ltd.
19:08:58.786 -> Dec  2 2016 14:21:16
19:08:58.823 -> OK
19:08:59.805 -> [4909] Failed to enable MUX
19:09:04.992 -> [10106] +CIFSR:STAIP,"192.168.3.27"
19:09:05.026 -> +CIFSR:STAMAC,"cc:50:e3:e3:d6:02"
19:09:05.064 -> [10116] Connected to WiFi
19:09:15.496 -> [20585] Ready (ping: 40ms).
19:09:17.400 -> LED on V1: on
19:09:18.380 -> LED on V1: off
19:09:19.378 -> LED on V1: on
19:09:20.377 -> LED on V1: off
19:09:21.371 -> LED on V1: on
19:09:22.391 -> LED on V1: off
19:09:23.387 -> LED on V1: on
19:09:24.401 -> LED on V1: off
19:09:25.396 -> LED on V1: on
19:09:26.402 -> LED on V1: off
アプリ上でLEDが点滅するようになりました。
確かにBlynk は勉強用&自慢には良いアプリ。
ただ、やりたいことによっては多くのウィジェットが必要となり費用がかかることと、自分以外で使うときには使いづらいかも。アプリを展開するにはサブスクバージョンが必要ですね。

個人ではちょっと払えないから、副業で少しもらえれば使ってみよう。
Smart Home IoT Blynk導入 2 解決編
前回、Blynk導入にあたり、ArduinoのSketchをBlynk Exampleから生成したものの、コンパイルができず。
散々調べた結果できたので、続きから。
前回のエラーは
Arduino: 1.8.12 (Mac OS X), Board: "Arduino/Genuino Mega or Mega 2560, ATmega2560 (Mega 2560)"

sketch_may06a:41:25: fatal error: ESP8266_Lib.h: No such file or directory
compilation terminated.
exit status 1
ESP8266_Lib.h: No such file or directory

This report would have more information with
"Show verbose output during compilation"
option enabled in File -> Preferences.
要は、ライブラリ(BlynkESP8266_Lib.h)が足りないということ。
Manage Librariesのインストールでは入らないのであれば、マニュアルインストール。
まず、Blynk の最新版のzipをダウンロード。
zipを解凍

BlynkESP8266_libがあり、これはManager Librariesではインストールされていない。
ArduinoのlibrariesディレクトリにBlynkESP8266_libのフォルダ自体をコピー。
librariesディレクトリは
To find the location of your sketchbook folder, go to top menu in Arduino IDE:
Windows: File → Preferences
Mac OS: Arduino → Preferences
で確認。

これでインストール完了。無事コンパイルが通った。
しかし。アップロードすると、うまく動かない。
シリアルモニターをみると
11:47:49.537 -> connecting to ESP 1connecting to ESP 2[10]
11:47:49.609 ->     ___  __          __
11:47:49.609 ->    / _ )/ /_ _____  / /__
11:47:49.644 ->   / _  / / // / _ \/  '_/
11:47:49.679 ->  /____/_/\_, /_//_/_/\_\
11:47:49.715 ->         /___/ v0.6.1 on Arduino Mega
11:47:49.750 ->
11:47:50.182 -> [629] Connecting to aterm-36be98-g
11:47:51.201 -> [1640] ESP is not responding
ESPのレスポンスがない???
// Hardware Serial on Mega, Leonardo, Micro...
#define EspSerial Serial1// or Software Serial on Uno, Nano...
//#include <SoftwareSerial.h>
//SoftwareSerial EspSerial(2, 3); // RX, TX
Megaだけど、Mega2560はSerial1じゃないの?
過去のLession SketchをみるとSoftwareSerial部分は
#include "SoftwareSerial.h"
SoftwareSerial softserial(A9, A8); // RX, TX
なので、softwareSerialを変更。
softserial と EspSerialで文字列が違うので合わせる。
/*************************************************************
  Download latest Blynk library here:
    https://github.com/blynkkk/blynk-library/releases/latest

  Blynk is a platform with iOS and Android apps to control
  Arduino, Raspberry Pi and the likes over the Internet.
  You can easily build graphic interfaces for all your
  projects by simply dragging and dropping widgets.

    Downloads, docs, tutorials: http://www.blynk.cc
    Sketch generator:           http://examples.blynk.cc
    Blynk community:            http://community.blynk.cc
    Follow us:                  http://www.fb.com/blynkapp
                                http://twitter.com/blynk_app

  Blynk library is licensed under MIT license
  This example code is in public domain.

 *************************************************************
  WARNING!
    It's very tricky to get it working. Please read this article:
    http://help.blynk.cc/hardware-and-libraries/arduino/esp8266-with-at-firmware

  You’ll need:
   - Blynk App (download from AppStore or Google Play)
   - Arduino Mega 2560 board
   - Decide how to connect to Blynk
     (USB, Ethernet, Wi-Fi, Bluetooth, ...)

  There is a bunch of great example sketches included to show you how to get
  started. Think of them as LEGO bricks  and combine them as you wish.
  For example, take the Ethernet Shield sketch and combine it with the
  Servo example, or choose a USB sketch and add a code from SendData
  example.
 *************************************************************/

/* Comment this out to disable prints and save space */
#define BLYNK_PRINT Serial


#include "ESP8266_Lib.h"
#include "BlynkSimpleShieldEsp8266.h"

// You should get Auth Token in the Blynk App.
// Go to the Project Settings (nut icon).
char auth[] = "JoG2IGS8QpJHDbIshSYOPbyao_TZL7BB";

// Your WiFi credentials.
// Set password to "" for open networks.
char ssid[] = "aterm-36be98-g";            // your network SSID (name)
char pass[] = "5017be9e5e30d";        // your network password

// Hardware Serial on Mega, Leonardo, Micro...
//#define EspSerial Serial1

// or Software Serial on Uno, Nano...
//#include "softwareserial.h"
//SoftwareSerial EspSerial(2, 3); // RX, TX

#include "SoftwareSerial.h"
//SoftwareSerial softserial(A9, A8); // A9 to ESP_TX, A8 to ESP_RX by default
//SoftwareSerial EspSerial(3,2); // RX, TX
SoftwareSerial EspSerial(A9, A8); // RX, TX


// Your ESP8266 baud rate:
//#define ESP8266_BAUD 38400

#define ESP8266_BAUD 9600

ESP8266 wifi(&EspSerial);


void setup()
{
  // Debug console
  Serial.begin(9600);

  // Set ESP8266 baud rate
  EspSerial.begin(ESP8266_BAUD);
  delay(10);

  Blynk.begin(auth, wifi, ssid, pass);

  // You can also specify server:
  //Blynk.begin(auth, wifi, ssid, pass, "blynk-cloud.com", 80);
  //Blynk.begin(auth, wifi, ssid, pass, IPAddress(192,168,1,100), 8080);

}

void loop()
{
  Blynk.run();
  // You can inject your own code or combine it with other sketches.
  // Check other examples on how to communicate with Blynk. Remember
  // to avoid delay() function!

  delay(1000);                        // stop the code for 1 second

}
シリアルモニターで動いた!!!!!!!!!!!!!
14:14:32.814 -> [9]
14:14:32.814 ->     ___  __          __
14:14:32.850 ->    / _ )/ /_ _____  / /__
14:14:32.884 ->   / _  / / // / _ \/  '_/
14:14:32.920 ->  /____/_/\_, /_//_/_/\_\
14:14:32.920 ->         /___/ v0.6.1 on Arduino Mega
14:14:32.990 ->
14:14:33.419 -> [599] Connecting to aterm-36be98-g
14:14:36.635 -> [3808] AT version:1.2.0.0(Jul  1 2016 20:04:45)
14:14:36.668 -> SDK version:1.5.4.1(39cb9a32)
14:14:36.704 -> Ai-Thinker Technology Co. Ltd.
14:14:36.738 -> Dec  2 2016 14:21:16
14:14:36.775 -> OK
14:14:37.730 -> [4907] Failed to enable MUX
14:14:42.931 -> [10106] +CIFSR:STAIP,"192.168.3.27"
14:14:42.965 -> +CIFSR:STAMAC,"cc:50:e3:e3:d6:02"
14:14:43.000 -> [10115] Connected to WiFi
14:14:53.439 -> [20604] Ready (ping: 59ms).
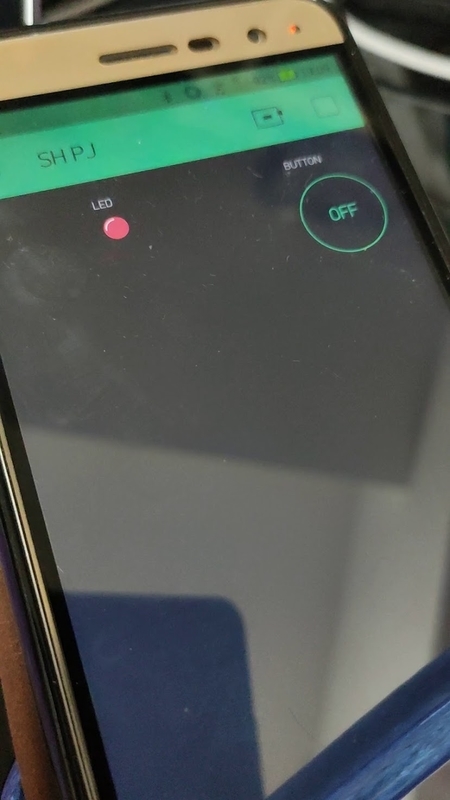
アプリをみるとオンラインになった。

ONを押すと黄色LEDが点灯

ONを話すと黄色LEDが点灯

お疲れ様でした。
How to Blynk with OSOYOO Smart Home IoT Learning Kit With MEGA2560
Smart Home IoT Blynk導入

Blynkを導入していく。
https://blynk.io/en/getting-started
サポートHardwareの確認。
https://github.com/blynkkk/blynkkk.github.io/blob/master/SupportedHardware.md
Arduino Nano, Mini, Pro Mini, Pro Micro, Due, Mega
Arduino Yunも当然サポートされているし、今回利用するArduino Megaもサポートされている。
Blynkサーバはクラウドでもオンプレでもでもあるようだが、今回はクラウドを利用する。
準備---------------------
1、ハードウェア
そのままMEGA2560を利用。
2、スマートフォンソフトウェア

![]()
![]()
3、ライブラリ
記載時に0.6.1が最新
導入 ---------------------
Blynkアプリ
Criate New Accountでアカウント作成


プロジェクト名を作成


デバイスを選択


Authトークンがメールで送られてくる。

Auth Tokenは、Ardino側で使うキーとなっている。
ボタンを設置

Energyが2,000まで使えるようだ。Buttonで200使うので後1,800。Enerygy Packで追加ができる。

Yellow Lightを D13 に接続したのでD13を選択。

ボタン設置完了

Arduino側の設定
BlynkライブラリをArduinoにインストール
Managerからインストール
Manage Libraries..を選択

Blynkを検索し、最新版をインストール


Sketchを生成
Sketch generator: http://examples.blynk.cc
Boardなど選択。Mega 2560があると安心。
Board: Ardino Mega 2560
Connection: ESP8266 WiFi Shield
Example: Blynk Blink

#include <ESP8266_Lib.h>
でエラー。ESP8266.hのライブラリがない。

Arduino: 1.8.12 (Mac OS X), Board: "Arduino/Genuino Mega or Mega 2560, ATmega2560 (Mega 2560)"
sketch_may06a:41:25: fatal error: ESP8266_Lib.h: No such file or directory
compilation terminated.
exit status 1
ESP8266_Lib.h: No such file or directory
This report would have more information with
"Show verbose output during compilation"
option enabled in File -> Preferences.
BlynkESP8266_Lib のフォルダ自体をArudinoのLibrariesにコピー
無事コンパイルが通ったよ。
しかし。
11:25:37.739 -> [9]
11:25:37.739 -> ___ __ __
11:25:37.774 -> / _ )/ /_ _____ / /__
11:25:37.812 -> / _ / / // / _ \/ '_/
11:25:37.846 -> /____/_/\_, /_//_/_/\_\
11:25:37.846 -> /___/ v0.6.1 on Arduino Mega
11:25:37.913 ->
11:25:38.341 -> [599] Connecting to aterm-36be98-g
11:25:39.362 -> [1609] ESP is not responding
きた!
12:03:51.575 -> [9]
12:03:51.575 -> ___ __ __
12:03:51.609 -> / _ )/ /_ _____ / /__
12:03:51.646 -> / _ / / // / _ \/ '_/
12:03:51.683 -> /____/_/\_, /_//_/_/\_\
12:03:51.683 -> /___/ v0.6.1 on Arduino Mega
12:03:51.751 ->
12:03:52.175 -> [599] Connecting to aterm-36be98-g
12:03:55.409 -> [3808] AT version:1.2.0.0(Jul 1 2016 20:04:45)
12:03:55.447 -> SDK version:1.5.4.1(39cb9a32)
12:03:55.481 -> Ai-Thinker Technology Co. Ltd.
12:03:55.515 -> Dec 2 2016 14:21:16
12:03:55.515 -> OK
12:04:00.819 -> [9235] +CIFSR:STAIP,"192.168.3.27"
12:04:00.856 -> +CIFSR:STAMAC,"cc:50:e3:e3:d6:02"
12:04:00.962 -> [9242] Connected to WiFi
Smart Home IoT Learning の 続きについて
OSOYOO Smart Home IoT Learning Kit with MEGA2560 は、Lesson18、19で2台のメッセージのやり取りを取り扱うのだが、それはそれで大事なのだが、4*4 Keypadはないし、スマートホームの作り方が網羅されていないのは残念。
複数台での規模を大きくしたSmart Homeを想定しているのかもしれないが、ホームキットの板に入らないしね・・・。
それぞれのモジュール自体の説明などはあるため、後は自分で書けば良いのだがコピペサンデーエンジニアには少々時間が必要となるのでつらいなぁ。
と思って調べていたら、OSOYOO Smart Home IoT Learning Kit with MEGA2560 は、
OSOYOO Yun IoT Smart Home Kit のアップグレードされたもので、Yun IoT Smart Home Kitは、4*4 Keypadのレッスンがあるではないか。

さらに、Smart Homeもあるので、ここまではやってみたいところ。というかこれが目的の第一歩。

また、YunはBlynk(https://blynk.io/)がベースで実装されているように見えてその方が実用的なようにも見える。(配布したらライセンスが必要になるようになった?)

まあ、使ってみるべし。
ということで、Yunベースの
・4*4 Keypad
・Blynk
・Smart Home Sytem
を読んで実装していくことを考える。
Smart Home IoT Kit Lesson18: Two Mega-IoT Devices
Lesson18: Two Mega-IoT Devices
Please be noted that if you need do experiment in this lesson, you need buy two pcs of Osoyoo Mega-IoT extension shields.
2セット必要なのでパス。
まあ、UDPの送受信なのでよいでしょう。